LD03: CSS Selectors due Thu 11 Sep 13:20

Preparation for Lab Day
In preparation for lab day, do these actions:- Make sure all changes in your work repository have been committed or discarded. Then pull
from the upstream repo (
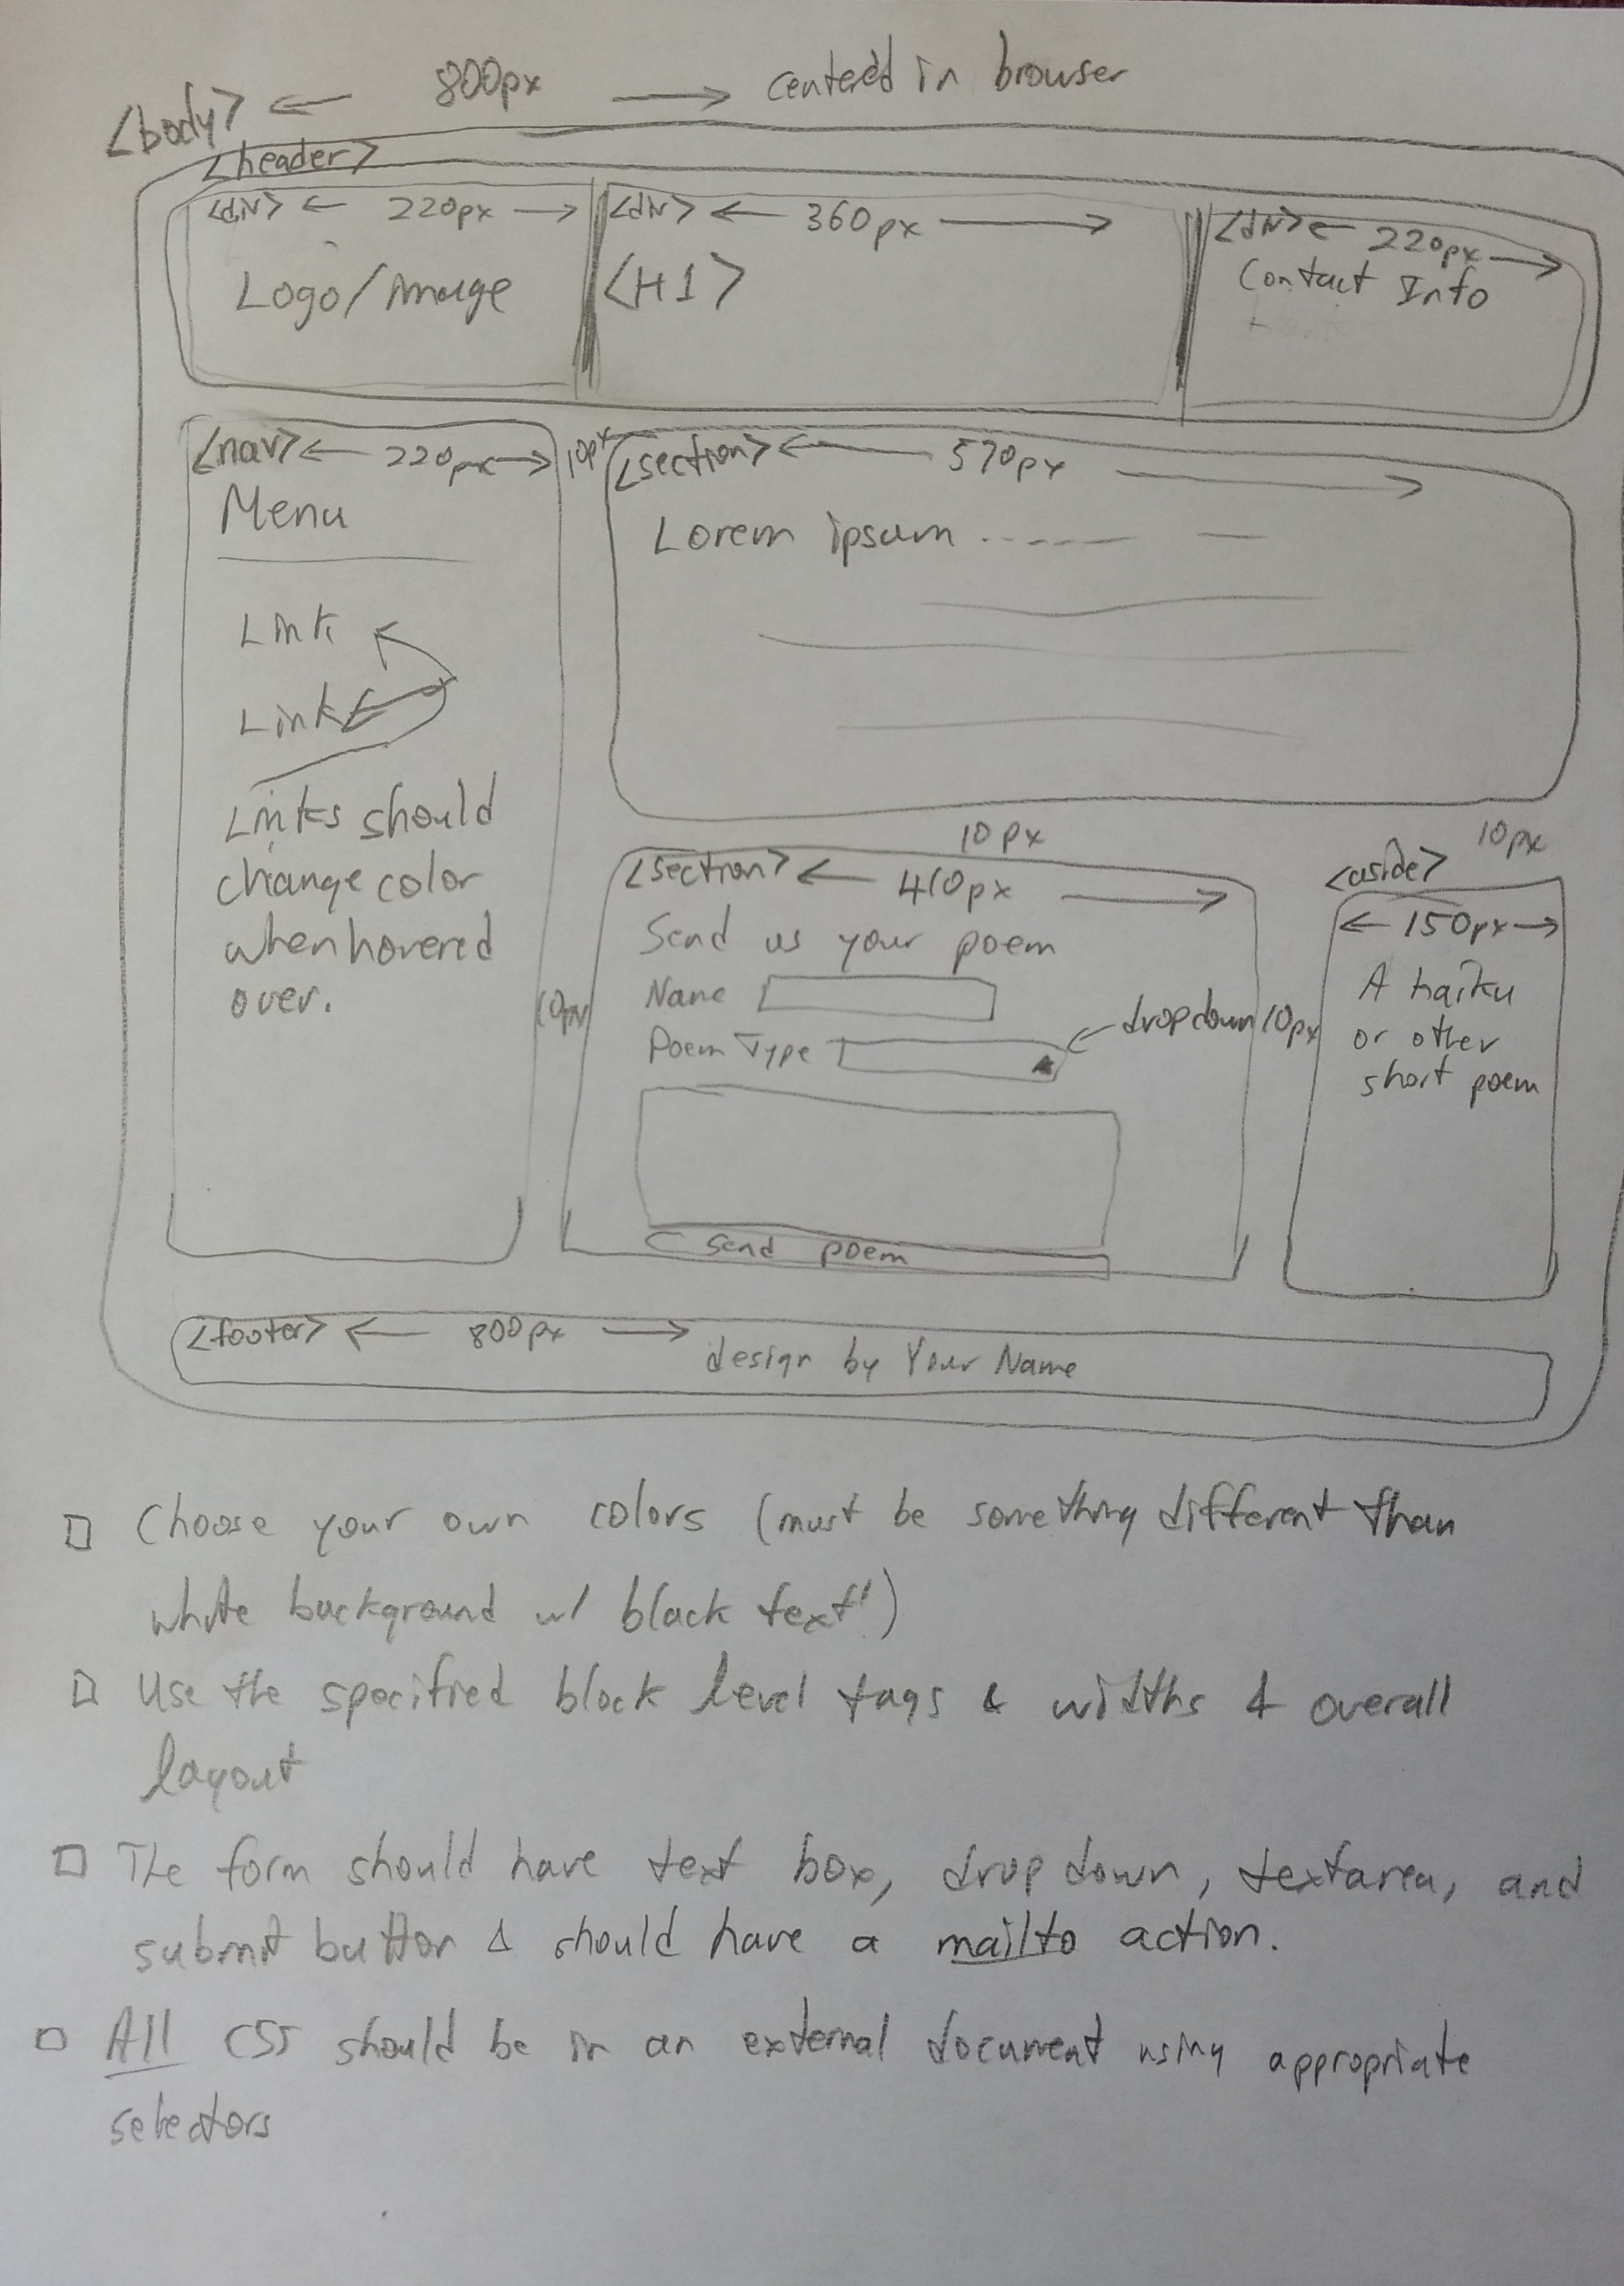
git pull upstream main). This should create a hw03 directory in which you will be doing your work for prelab, labday and homework this week. - You will be starting with the provided poemlayout.html document and with the
goal of making it look like this:
https://josephus.sergeantservices.com/classes/w1/source/images/poemlayout.jpg.
NOTE: Don't jump into trying to create the design directly. Instead follow the instructions below and use that diagram as a guide to fill in the blanks.
- In hw03 create a CSS document named poemlayout.css and in
it put a command that will assign properties to the body to give it a
maximum width of 800px and to center it on the page. Also add commands
that will apply border-box box sizing to all elements on the page.
- Now modify poemlayout.html to include a link tag in the head
which will utilize the CSS document you just created. Don't move on to
the next steps until the code in the CSS document is affecting the HTML
document.
- INFORMATIONAL NOTE: The tags header, nav, section,
aside, and footer are all just rectangles. They could all
easily be replaced with div tags and the page would be rendered in
the same way. We use these other names for situations where they
appropriately identify the type of section we are working with. Doing so
makes the code more readable and makes CSS selections easier than if
div was used everywhere. (If none of those terms applies then use
div.)
- Add CSS commands to give background colors to each of the block-level
elements on the page (header, nav, section, aside, and footer).
They should each have slightly different color and be light enough for
black text to be easily legible on them. They should also have a
different background color than the body. That is, we want to be able to
easily visually identify where each block begins and ends.
- Commit and push your work.
On Lab Day
- Begin by showing your prep work to the instructor.
- NOTE: Do not use any inline CSS commands in this exercise ...
only use CSS selectors with CSS commands specified in poemlayout.css.
- Briefly take a look at the basic design we will be moving towards:
https://josephus.sergeantservices.com/classes/w1/source/images/poemlayout.jpg.
REMEMBER: Follow the instructions first, and use the diagram to fill
in gaps.
- Give proper widths and float properties to nav, the two sections, and
aside to get them oriented approximately like the picture. NOTE: The
diagram is assuming a fixed-width design of 800 pixels. When you specify
widths you should use a calculator to convert to percentages. For example,
the div that will hold a logo/image has a specified width of 220px. If you
divide 220 by 800 you get 0.275 which corresponds to a width of 27.5%.
(Likewise, a margin of 10px translates to 1.25%.)
NOTE: When you are working with widths inside of another div then to calculate percentages you'll need to place 800 with the width of the outer div.
You may find it helpful to put the two sections and the aside inside a single div/block and to give that block an id of “content”. All CSS commands should be placed in the poemlayout.css document.
- Now add margins to get each div to line up nicely. When you are finished
with this step your page should like like this (but with your own color
choices):
https://josephus.sergeantservices.com/classes/w1/source/images/poemlayoutblock.png.
NOTE: We are focusing on getting the basic layout in place before we are concerning ourselves with the content!
- Take a moment to do a syntax check on your work so far. In the
VSCode command-line enter this:
npm run check -- hw03
Inspect the output and fix any errors that are reported. Then re-run the check command. Continue this process until no errors are reported. - This is a good time to do a commit in your repo. Then have the
instructor look at your work so far and give feedback.
- Focus on the header layout for a moment. You want to divide it
into three parts having widths specified in the original drawing.
Put simple text in each div and give each div a slightly different
color so you can see where each begins and ends.
- Now we are ready to begin adding content. Start with the section
containing the text “Amazing form!”. Eventually we will put a form
in that spot, but for now let's just put a poem. Find an appopriate
poem and put it in that spot. Be sure to properly format it.
- In the “Amazing lorem ipsum” section put a couple of paragraphs
of lorem ipsum.
- In the “Amazing menu” section add three links to poem websites of
your choosing. Do not keep the default blue/purple link/visited link
colors. Customize them using pseudo-selectors. The links should be in
an unordered list.
- Run another syntax check and address all errors.
- Do a commit and push in your repo. Show your work to the instructor. If you finish early you can start work on the homework assignment will continue work on this page.